Category: Recipes

  • Viral Salmon Bowl Recipe

    Viral Salmon Bowl Recipe

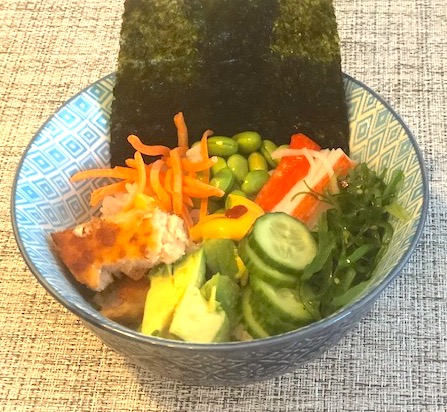
    There has never been a shortage of viral videos all over the internet, especially about food. They range from odd, to super weird, to everything in between. I’m not typically interested in these videos, but the internet seems to get it right every now and then. This salmon bowl is just amazing since it is the perfect mixture of salty, creamy, and umami. It originated from Emily Mariko, a food and fashion enthusiast on social media. She used it as a way to repurpose leftover salmon (and in doing so, does some pretty freaky things by microwaving it with an ice cube). I choose to use fresh salmon and bake it just for this recipe. I have also substituted rainbow trout, and my family was none the wiser 🙂

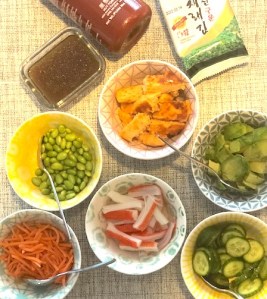
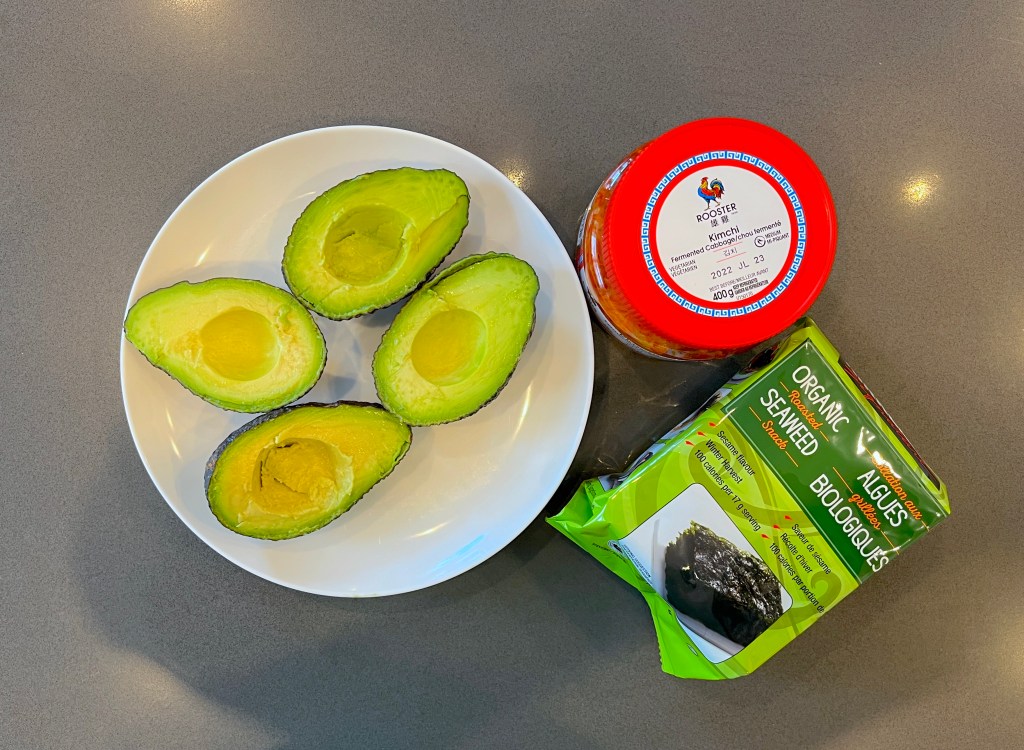
    Here are some of the key points of this recipe. The recipe gets its creaminess from the mix of avocado and mayo. You can always add less mayo or use a lower-fat version to cut some of the fat out. You can adjust the heat level by adding less or more hot sauce. Costco carries a great line of dried seaweed. It has been approved by both my kids and my Korean in-laws. If you aren’t familiar with kimchi, it is a fermented cabbage that includes Korean spices and lots of garlic. Rooster is a great brand and is readily available in most Asian grocery stores (I’ve even seen it at my local No Frills!). Pro tip: Once the jar has been opened, put it in a grocery bag (or two) before storing it in your fridge. Otherwise, it will cause your other food to smell.

    Ingredients

    • Salmon or trout (1 piece per person)
    • Cooked white rice
    • Low sodium soy sauce
    • Mayonnaise (the original recipe calls for Japanese mayo but I find regular works perfectly)
    • Sriracha Hot Sauce
    • Avocado
    • Seaweed Squares
    • Kimchi

    Preparation

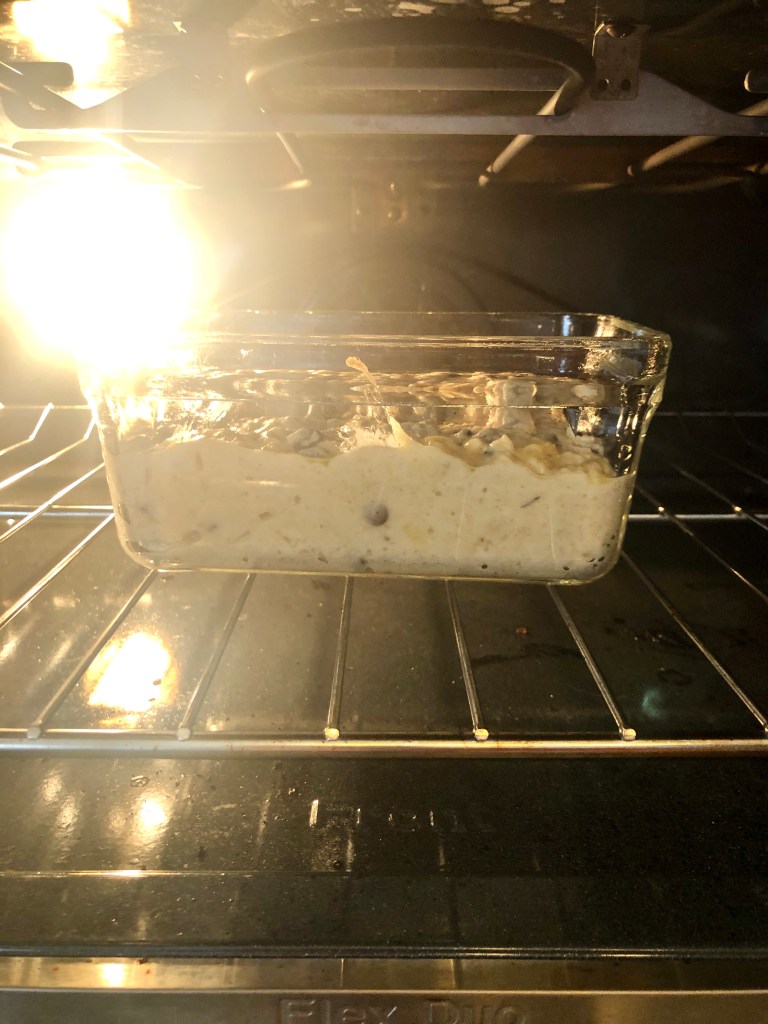
    1. Prepare the fish. I typically lightly season the fish with salt, pepper, garlic powder and onion powder. But you can season it however you like. Bake it in the oven at 400 degrees for about 12-15 minutes or until it is opaque in colour and flakes with a fork.
    2. Prepare the rice as per box direction, or using a rice cooker
    3. Once everything is prepared, layer rice in your bowl with your salmon. Add approx 1 tbsp of soy sauce and 1/2 tbsp each of mayo and sriracha. Feel free to adjust to your taste.
    4. Use your fork to mash everything together
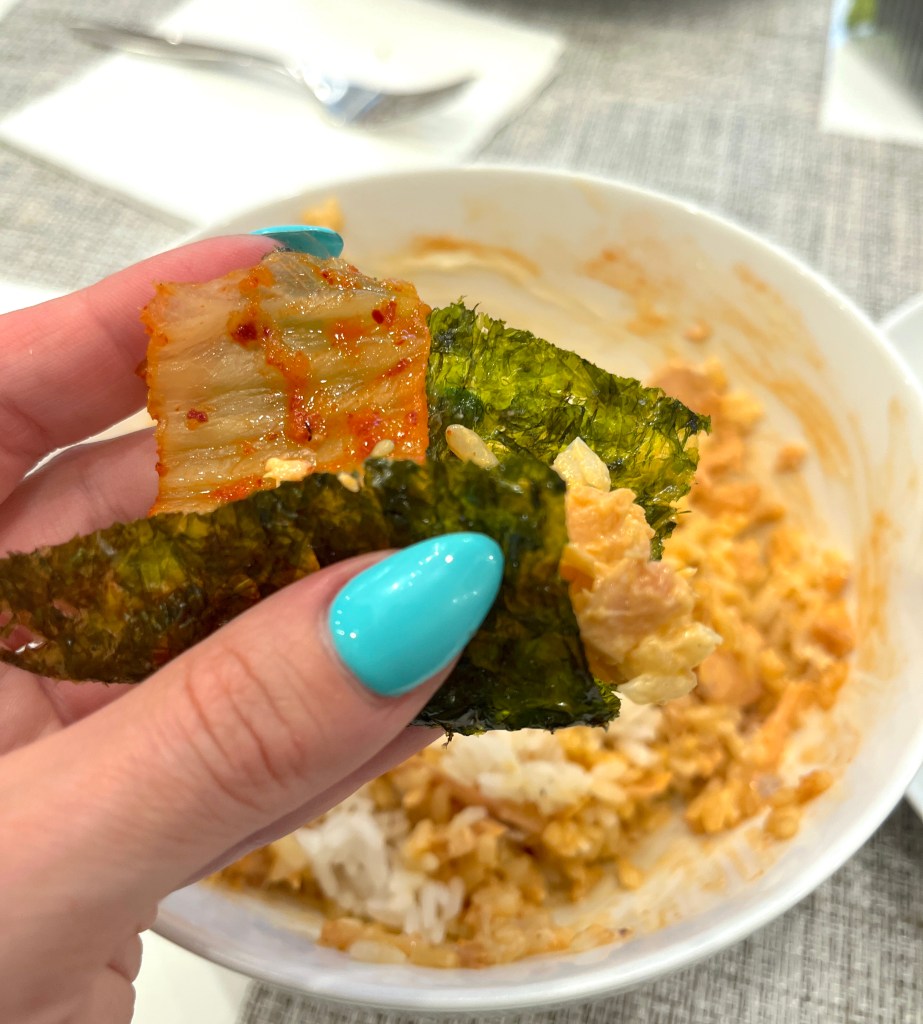
    5. Use the seaweed to pick up bitd of the salmon/rice mixture. Eat with avocado and kimchi.

    Don’t forget to let me know if you enjoyed this recipe!

    This is life. Love, Mom.

  • DIY Poke Bowls

    DIY Poke Bowls

    Recently, J announced she wanted to follow a pescatarian diet. This meant no meat or chicken, only fish and plant-based protein. This wasn’t a huge change for us, as I rarely cook red meat at home to begin with. But that said, I wanted to find different ways to incorporate fish into her diet. You may notice a theme in all the recipes I share – mix and match. I find these recipes do the best in our house since everyone’s tastes are different. Instead of trying (and failing) to make one dish that satisfies everyone, allowing people to choose their own toppings and mix-ins has been huge. This way I don’t feel like I am running a kitchen, and there is less complaining about the meal. Win-win in my humble opinion.

    If you are not familiar with poke bowls, you are missing out. Truly. These bowls, which originated from Hawaii, are typically prepared with a rice bottom, raw fish, vegetables, and an amazing sauce. I use cooked fish only, as J isn’t a fan of raw. But if I was to make this for Hubby and me, I would definitely add some sushi-grade tuna. I will share below what I put out, and some other suggestions for you to include. Feel free to omit or add anything that appeals to you or you have laying around your fridge.

    A note about the rice. I use Korean short-grain rice because that is what I have in my house. Years ago, my Korean mother-in-law taught me how to make rice with a rice cooker. It involves rinsing the grains to remove some of the starch, and using enough water to come up to your knuckle. Truly though, any type of rice would do. If you don’t have a fantastic mother-in-law proficient in rice making as I do, I would suggest following the instructions on the package you buy.

    An ingredient preview

    Recipe rundown:

    • Cooked rice (approx 1/4 cup per person)
    • Sauce
      • 2 tbsp low sodium soy sauce
      • 1.5 tbsp rice vinegar
      • 1 tbsp sesame oil
      • 1 tbsp lime juice
      • 1 tbsp honey
      • dash of sesame seeds
    • Protein
      • I love using PC salmon burgers in this recipe. I oven bake them or fry in my cast iron skillet and then cut them up
      • Cooked shrimp
      • Immitation Crab
    • Toppings
      • Avocado
      • Edamame (I use the pre-shelled frozen ones!)
      • Shredded carrots
      • Cucumbers (I marinate mine in a bit of rice vinegar and salt)
      • Seaweed Salad
      • Dried seaweed
    • Spicy mayonaise (we use a store bought mayo but you can always mix some regular mayonaise with siracchia to taste)

    In case you are reading this and thinking “there is no way my kids would eat that”… let me tell you – J eats all of it with the exception of the spicy mayonnaise. N, on the other hand, only eats rice, dried seaweed and his weight in edamame. So please don’t feel bad if your bowls don’t look like these. Do what works for YOU! Have any other topping suggestions?? I’d love to hear them!

    This is life. Love, Mom.

  • Fri-ta-tta, Fri-tah-tta

    Fri-ta-tta, Fri-tah-tta

    I *may* have mentioned once or twice that breakfast for dinner is a go-to in my house. We love eggs, since they work so well for fast, easy suppers, and will be eaten by both picky N and pescatarian J. Frittatas are the best dish for throwing in whatever you have in the fridge and getting rid of the odds and ends. It’s also a great way to get veggies into children who think you are not a parent but a line-cook.

    My best tip is to invest in a cast-iron skillet. They are not as pricy as you may think. Here is a non-affiliate list of options from Amazon: https://www.amazon.com/s?k=cast+iron+skillets&crid=20L868YPHXYO9&sprefix=cast+iron%2Caps%2C191&ref=nb_sb_ss_ts-doa-p_2_9 The cast iron makes the stove-to-oven action super easy. It also makes the egg super crispy (aks super delicious) on the edges. There is one simple thing you have to remember about cast iron. Under NO circumstances do you use soap to wash it. To clean, you can boil some water in the bottom of the pan or use salt as an abrasive to get the bits off the bottom. Then coat with oil before you put it away and it will be ready for the next time!

    So back to the egg-cellent recipe…. Here is the frittata base (mix the following all together):

    • 6 eggs
    • 1/4 cup milk
    • 1 garlic clove (or 1/2 tsp minced garlic)
    • 1/4 tsp salt (less if using a very salty cheese or meat)

    The best part, as always, is what you can mix in. In the photo on the left I have cherry tomatoes, brie, and zaatar seasoning. Not sure what to put inside? Here are some combinations ideas:

    • spinach and fontina cheese
    • bacon and cheddar cheese
    • peppers and onions
    • broccoli and white cheddar
    • sausage and peppers
    • salami
    • chicken and goat cheese
    • tomatoes and basil
    • mixed cheese
    • caramelized onions and swiss cheese

    Simply put your mix-ins at the bottom of the pan (minus any cheese) and cook them slightly. This is especially important for vegetables that hold a lot of water, such as spinach and broccoli. Otherwise, the eggs won’t set properly. Make sure there is enough oil in the pan so the eggs won’t stick, and pour the egg/milk mixture on top. Ensure the ingredients are all over the pan instead of in just one place. Top with the cheese. Bake at 400º for about 15-20 minutes. If you find the cheese is burning you can always lightly cover the pan with some tinfoil for part of the cooking time.

    Pictured right: Spinach, mushroom and an Italian 4-cheese blend

    I would love to know what you would put into your frittata! Share your combinations here for all to enjoy.

    This is life. Love, Mom.

  • Mix and Match Granola

    Mix and Match Granola

    I have always loved granola. There is something about it that is crunchy and satisfying no matter what is in it. For a long time, I was very intimidated to make my own. I think it was a combination of not wanting to ruin a food I loved, and not finding the right recipe. So many of the recipes I have found online are either “no-bake” (which doesn’t give the same crunchy texture), or full of processed sugars (which are great in some recipes, but not in my morning granola). Well low and behold, I happened across the BEST granola recipe. The first time I made it was for a staff breakfast. I doubled the recipe and was SO glad I did because it went FAST. My favourite part is that I can literally throw whatever I have in the pantry into the mix, and it always turns out great. The original recipe is from The Seasoned Mom (https://www.instagram.com/theseasonedmom) but I have made some little tweaks of my own.

    Pictured above: granola with unsalted sunflower seeds, cashews and almond butter

    Ingredients

    • 4 cup old-fashioned oats (make sure they are not quick-cook)
    • ¾ cup wheat germ
    • 1 t. salt
    • ¼ cup coconut sugar
    • ½ c. maple syrup
    • 2 tbsp natural peanut or almond butter
    • ½ cup coconut oil
    • ½ tsp cinnamon
    • ½ tsp vanilla extract
    • ½ cup dried cranberries
    • ¼ – ⅓  cup mix-ins (see below for ideas)
    • ½ cup shredded, unsweetened coconut

    Instructions

    1. Preheat oven to 325 degrees F.
    2. Line a pan with aluminum foil and spray with cooking spray. I like to use a coconut oil spray.
    3. In a large bowl, stir together oats, wheat germ, cranberries, coconut and mix-ins. TIP: Pick a bowl you think will fit the ingredients, then use the next size larger. Trust me, when you are stirring everything together you’ll thank me.
    4. In a small saucepan, mix together salt, sugar, maple syrup, coconut oil, nut butter, cinnamon, and vanilla. Heat until it is all melted and smooth.
    5. Pour the “sauce” over the dry ingredients and stir well. Make sure all the dry is coated with the wet ingredients. Then, spread onto the pan to bake. TIP FROM THE ORIGINAL AUTHOR: Use a wooden spoon to gently press together clumps of the oats to get those great crunchy clusters at the end!
    6. Bake for 15-20 minutes, stirring halfway through, then pressing down with the spoon again before returning to the oven
    7. Remove from the oven, and press down with the wooden spoon again to form those clusters, and allow to cool completely before storing granola in an air-tight container. I typically store it in the fridge to keep it fresh, but it can also stay on the counter for about 2 weeks (although ours always gets eaten before that).

    Things To Note:

    • If you’re like me, you have never purchased wheat germ before. It is very easy to find, usually in the breakfast aisle of the grocery store. It is also a necessary ingredient for adding texture and fibre to the granola. Make sure to store your opened wheat germ in the fridge!
    • You can use brown sugar and/or honey instead of the coconut sugar and maple syrup based on your taste preference. I would not recommend white sugar here
    • Feel free to sub out the nut butter with a seed butter or even Wow Butter (I have done both for a school-safe alternative)
    • This can easily be made nut-free for school by adding more oats, fruit, or seeds as the mix-ins (the original recipe was meant to be nut-free)
    • Let me tell you, the mix-ins are where it’s at! I have used everything under the sun! Sunflower seeds, pumpkin seeds, pistachios, cashews, slivered almonds, chia, or this PC Super Seed Mix (https://www.presidentschoice.ca/product/pc-ancient-grains-and-er-seeds-blend/21024184_EA) Truth be told, it’s usually whatever nuts I have in my pantry that I want to get rid of.
    • You can sub out the cranberries for raisins or another dried fruit. I’m sure dried papaya or mango would be great! Or you can just omit it completely
    • Keep in mind, the more mix-ins you add, the “drier” the granola will be as there won’t be enough sauce to glue it together. Sometimes, I get overzealous and add too many extra things. The granola will still taste great, but you won’t get those crunchy clusters.

    I can’t wait to see your granola creations! Tag me on Instagram, or comment with your favourite combo. Let’s mix and match, together!

    This is (a delicious) life. Love, Mom.

  • Sweet and Savoury Waffles

    Sweet and Savoury Waffles

    I don’t know about you, but breakfast for dinner is a huge deal in our house. I’ll be honest, it’s my second favourite meal after brunch. Breakfast for dinner is a super-easy way to get all the food groups into my kiddos quickly and easily. It usually involves some kind of egg (scrambled, fried, or omelette style) and waffles. Keep reading for some of my favourite mom-hacks and flavour combinations. Now, I am not here to preach to you about no sugar, all-natural, gluten-free food. In our house, we believe in everything in moderation. If you are a mom who makes everything from scratch that is all-natural and without any preservatives or sugar, give me your address and I’ll send you your medal. That is not who I am.

    Waffles are not an everyday meal, but we do enjoy them. So when I make the kids waffles, I use pancake mix. My preference is the mix where you add an egg and milk, but I don’t always find it that convenient because you need to make a set amount. These days, we are loving the Krusteaz mix from Costco (or found here https://amzn.to/2V1y5WK).

    MOM HACK #1: I do try to make the waffles a bit healthier by adding a teaspoon of ground flax and/or chia. These ingredients help bump up the fibre and omegas without messing with the taste. Don’t forget to keep both of those items in your fridge for maximum freshness.

    MOM HACK #2: This is a great place to throw in some fruit for your picky eaters. Frozen blueberries work perfectly here.

    I won’t include a specific recipe here, because the best thing to do is to play around with the flavour combinations. Simply make the waffles according to the instructions on your box, and throw in some extras. Just make sure to grease your waffle iron well, especially if you are using cheese. My kids love savoury waffles, too! Here are some things we are loving these days:

    • Mini chocolate chips (a couple tablespoons only, a little goes a long way)
    • Pomegranate seeds and slivered almonds
    • Cinnamon and vanilla
    • Frozen blueberries or raspberries
    • Shredded mozzarella cheese and garlic powder
    • Everything seasoning (you won’t regret this one, trust me!)
    • Shredded cheddar cheese and pickled jalapenos

    MOM HACK #3: If you own a waffle iron like mine, the plates do not come off, which makes it super fun to clean. When I am done cooking, turn the iron back on and put a wet paper towel inside for a few seconds. Make sure the paper towel is pretty wet but not dripping, and do NOT walk away from the iron. The wet towel will create some steam and help lift the sticky bits off the griddle (or in my case, the top of the castle), making it easier to clean.

    As with other recipes, I love trying new food combinations. J is a super foodie, and loves to come up with her own, too. If you make this recipe, please feel free to tag me on Instagram, or comment here with your favourite flavours for us to try!

    And don’t forget – waffle mix, like everything else in life, is OKAY in moderation!

    This is life. Love, Mom.

  • Foolproof Banana Bread

    Foolproof Banana Bread

    I have always loved baking. Cookies, bread, muffins, and granolas – I honestly love them all. It is one of my major stress-relievers. I think it has to do with something with being able to control what I put into the recipe. Once J was old enough to start eating solids, I began experimenting with healthier ingredients. I love making healthier versions of favourites, and “tricking” my family into eating things that are better for them.

    When I started dreaming up my blog, I knew that recipes had to be a part of it. My go-to recipe is this banana bread. I have made it so many times that I know the recipe by heart. I started with a recipe from Simply Recipes years ago and made adjustments as I went. Each time I changed a little bit until one day it was perfect! When I was thinking about my favourite recipes I knew that my banana bread was the place I needed to start. It is my most requested recipe for potlucks and brunches. One of the things I love is that the recipe is very forgiving. It’s no-fuss, one bowl, and so easy my kids can help with 75% of it! I love to change up the mix-ins. I have put some combo suggestions at the bottom of this post. My favourite way to bake it is in a glass pan that comes with a lid. Then it’s super easy to bake and store (if you even have any left afterwards haha) I’ve linked one similar here (https://amzn.to/3Ahh1wb)

    SOME TIPS: (1) If you have too many bananas going bad, this is the perfect time to make banana bread. If you aren’t ready to make it right then and there, unpeel them and freeze them in a ziploc bag. Then take them out and let them thaw for about 30 minutes before you are ready to bake. (2)I have played around with the all purpose/whole wheat flour rations. I find 2:1 is a good combination. Any more whole wheat flour and it becomes more grainy. If you wanted to forgo the whole wheat flour and only use all-purpose, you can definitely do that! (3) Lastly, if you are adding something sweet, you can safely cut back on the sugar a bit more to 2/3 of a cup. The original recipe had a full cup of sugar but that was more sugar for me.

    Ingredients

    3 large (or 4 small) smashed, ripe bananas

    1/3 cup melted butter or melted coconut oil

    3/4 cup white or coconut sugar

    1 egg, beaten

    1 teaspoon vanilla

    1 teaspoon baking soda

    1/2 teaspoon salt

    1 cup all purpose flour

    1/2 cup whole wheat flour

    1/2 cup mix-ins of your choice

    (see note at the bottom)

    Method

    1. Preheat oven to 350 degrees farenheit
    2. Mix bananas and melted butter or coconut oil in a bowl
    3. In the same bowl add the sugar, egg and vanilla
    4. Mix in the baking soda, and salt
    5. Mix the flour and your mix-ins in last. Make sure not to over mix
    6. Pour into a greased loaf pan and bake for 40-60 mins. This will depend on your oven so make sure to check! When I bake on a convection setting it only takes about 40 minutes. It will be ready when a tester comes out clean. TIP: If you find the bread is getting too brown on top, you can cover it with a piece of tinfoil for part of the baking process.

    Looking for some great mix-in combos?

    Here are some of my favourites:

    • White chocolate chip and pecans
    • Dark chocolate chips and peanut butter chips
    • Milk chocolate chips and walnuts
    • Chocolate chunks
    • Butterscotch chips
    • Swirling in 2 tbsp of melted nutella or nut butter before you bake it (I have even mixed in a little bit of Wow Butter for a school-friendly option!)

    I baked a dark chocolate and pecan version for this post. I LOVE hearing about and trying new flavour combos. Comment and tell me what you would mix into your banana bread. Or better yet, make it and tag me on Instagram! You can find the link at the top of this page.

    This is life. Love, Mom.